 |
| How most kits arrive |
 |
| How it all begins |
When a kit arrives this is the way I start.....
.
 |
| labeling bags |
1) I take the time to check ALL parts. When I say check, I check ALL resistor and capacitor values with a meter. The inductors I check the banded color codes as the value can vary with frequency.
2) I then check part numbers and compare that to the manual. So diodes, transistors, IC's, crystals, relays, knobs, thermal pads, screws, standoff's .....you get the idea.
 |
| Checked parts |
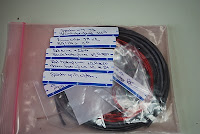
3) Each part or group of the same parts go into a zip lock bag with a stick on label. Static sensitive parts stay in their bags and a label goes on that bag. The label may consist of the value such as it's resistance or capacitance, part number, a description and if more than one of the same part (screws, resistors) the label will have the total amount as well. All resistors, capacitors, inductors and hardware etc go into their own larger bag labeled hardware, resistors....etc When each part comes out of the zip lock bag the value or part number is checked again, the amount on the label is decreased (if there are more than one of the same part in the bag)
 |
| Wire and cable bag |
When the above steps are done the kit building begins......Why do I do it this way......
1) The kit building process is rarely interrupted, a missing part can be sent to me and most times that part when needed arrives in time. Instead of getting to that point in the build and waiting for the part to come. Also some part numbers do not match the parts list. Most times it is the same part but due to availability limitations another manufacture was used. I still email the kit company. Again I don't have to stop the build to check.
2) Checking each part gets me familiar with all the parts. I have found very subtle differences with some parts. A mistake of soldering the wrong part in a slot is very difficult I find if I follow this process.
3) The work place is kept very neat with the larger kits this is very important as parts can get dropped and lost. I generally start out with about four large bags each containing smaller bags of hardware, resistors, inductors and capacitors etc.
4) This is the last and most important tip....these steps do take time and my XYL see's this as time spent building and not buying more kits.
No comments:
Post a Comment