Showing posts with label Kit building. Show all posts

Friday, March 13, 2020

Why did I overlook the simple?

What is going on?
Back in November 2017 I ordered and built the Funk Amateur FA-VA4 antenna analyzer kit. The kit was built and passed the smoke test without issue. I then went through the calibration process and it was successful (so I thought). I was not able to get the unit to work and I felt it was due to user error and tried to run the calibration again but without success. No matter what band I checked the SWR was off the scale. I even connected the device to a dummy load without success. I read and reread the manual and even checked out some YouTube videos and was just getting more frustrated so I was thinking of selling it to someone who knew how to operate the unit. As I watched more Youtube videos it seemed like a very straight forward unit to operate. Over the course of a year or more, I picked up the unit and tried to figure it out but just could not.
The issue
This past week I picked it up again and was looking it over but in so doing for some strange it occurred to me to open up the kit and look over my work. It's embarrassing to say but as I looked the board over I saw that the female BNC connector  I did not solder the BNC center pin to the PCB board!!! I soldered this pin, did a reset to the unit and then ran the calibration again BUT this time the calibration took a lot longer. Once it was done I connected it to my Endfed antenna and checked 15m this is a band that I know the SWR is decent. Low and behold the unit worked as it should way back in 2017!! I just can't believe that I overlooked the obvious to open the kit up and have a look around. I now get to discover this great unit that I built years ago.
All is well 

Sunday, May 13, 2018

Kit building time.

When the bands are slow it's time to build a kit! I have had this RF probe kit from  Pacific Antenna that has been gathering dust and just this past weekend I decided to put it together. It's a very simple and easy kit to build and can prove to be a useful tool as well. The circuit board was simply a cap, diode and resistor. It sure was nice to get the soldering iron out and again! This mini kit is nothing
Almost done
compared to the Elecraft k2's I have built in the past. It did get me thinking that when I retire in a year and a half and if the kits are still available another K2 kit would be a nice way to pass the time in retirement. This kit went very fast but I did take my time with it as I really enjoyed getting back into the kit building again. I did find with this kit the provided jacks that are used to plug into your multimeter were not a solder type but held the test leads in via a screw. In the past I have had issues with these loosening off. I went to my trusty "this and that" pile and found two solder type and subbed those in. I have yet to use the RF probe but it was a fun little project.

Sunday, September 14, 2014

A good afternoon on the radio

Just a bit more tidy
Today I took the chance to clean up the radio desk a bit, now that the LP-100A has been removed from the desk and sold I had a chance to rearrange things. I find it so funny that I remove one coax jumper at a time, then move a device  and re-attach the coax jumper and having done this to about 4 radio devices somehow I still end up with something going not where it should. I then have to trouble shoot things to get them back to "normal". Well things are working again and the shack/roll top desk is a little more organized. It was now time to get on the radio and see what was happening out there. I started out on 17m and came across W1AW/5 calling CQ I decided to drop my K3's power down to 500mW's and see how I did. I was able to snag him on the first call which meant it was a 2,211 miles per watt contact!
I then slipped over to 15m and came across V5/DK1CE calling CQ he was running split and it's not very often I try the split thing. It was only once before I was able to make a contact running split. I gave him a go and with about 2 repeats I was able to get into Namibia with 5 watts! I was thrilled to not only make a contact operating split but also to have my MFJ 1788 loop antenna with 5 watts make the trip.  

Sunday, December 22, 2013

A hard decision to make.........

My 1/2 built K2 is up for sale
Many decisions have been made here at VE3WDM in the past few months. We decided to downsize to a condo in so doing we moved to a very nice condo on the lake in Toronto. Many things had to be sold including ham radio related items. The shack had to be downsized but not shut down! Over the weekend I took another look at items I have that I'm not using. So some small items went up for sale and one BIG item that I have been mulling over for some time.....my 1/2 built K2 went up on the market today. This was a hard decision as I really enjoy kit building but with the small space it was just not going to work out. This is my second K2 and I did have a blast putting the first one together as well as 1/2 of this one. It's up on the Elecraft user group site. There was a heart stopping moment when one email asked me what the serial number was of the kit. No problem I packed it in three boxes, once opening them the contents were just the casing and the boards that I had 1/2 built.....WHERE ARE THE PARTS!!!! Did I toss them with the "junk". A fast check of  some boxes in the locker cleared up the question and all were parts were found safe and sound.

Saturday, August 10, 2013

Toroid winding can be fun.....well almost.

The dreaded toroid...
When I first started kit building some years ago it was the dreaded toroid winding that I never looked forward too. After winding and rewinding over time it has not become a dark task, it has taken some time to get the hang of it but I can say that I  no longer get uptight about the process. I have learned some tricks and some never ever skip steps when it comes to toroids. 
I am in the process of building my second K2 rig from Elecraft and there are lots of toroids to be wound. Now having said that if you want you can order per-wound toroids from the toroid guy. If you do order toroids that are per-wound I would encourage you to try to wind your own as well. What I have found is it's only practice that is needed to get the hang of the winding thing. In the past I have built many Elecraft kits were toroids have been involved, I have learned as I said some tricks, some must do stuff and things to stay away from when it comes to this art. 

Saturday, April 13, 2013

Time to do some kit building

Oliver is keeping an eye on things
I was on the radio this afternoon and not much was on the WARC bands   (CW contesting on the other bands) it was time to spin my chair 180 degrees to the project desk. I am in the process of building another Elecraft K2 that when done will be put up for sale. This was supposed to be a winter project but the bands were busy and I was on the radio and not the soldering iron. Now the K2 build has become a spring project. A few years ago if I was asked about kit building I would not ever considered it....BUT...I have been bitten by the bug!! Along with my QRP and QRPp operating I also find kit building to be a very relaxing way to spend time. There are some kits which I have sold such as my Elecraft KX1 and
Control board completed
Some tricky lead forming
LP-Pan. Funny thing is after building something you attach a personal ownership to it that over the counter commercial equipment does not have. I have sold many items purchased but not built and thought nothing of it (other than it was money to get another kit with...maybe time for kit builders anonymous). As for the kits when it came time to say goodbye to make some coin it took some thought before they were put up for sale.
As was said I am in the process of building another Elecraft K2 and I have another blog that deals with the build. I wanted to blog the progress but also highlight other areas such as toroid winding, what was needed to be a kit builder and so on. There are specific posts about the K2 build it self making mention of tricky sections of the build and how it was handled. It's now time to see if the bands have come alive!!

Saturday, March 30, 2013

K1EL Winkeyer USB complete

K1EL Winkeyer ready for action
For some time now I have wanted a stand alone keyer as well as one that integrated with my PC allowing me to change and update messages.  The Winkeyer USB is the perfect match as I am able to add 3 AAA batteries and take the keyer with me on outings or keep it at the desk hooked up to the PC via a provided USB cable. The unit comes as a kit with all SMD components already on the board so there is no worry about having to deal with super small parts and the soldering headache that goes along with it. The kit was shipped out and delivered very fast and very safely boxed for the ridge to my QTH. 
The first day of assembly
 The only thing that has to be downloaded is the instructions. I find this to be a fantastic way of doing things. If there are updates to the build then it's a simple update on the website and you are downloading the current assembly instructions. Take the time to print off the instructions that way you can check components off as you do the inventory.  Do yourself a favor and print the instructions in color as there are some great pictures to assist you. The kit went together very smoothly and KE1EL put thought into the order of  assembly. Follow the order and the kit
Battery holder

Thursday, March 14, 2013

K1EL WKUSB keyer

About a month ago a new kit arrived and is still sitting waiting to be built. With some thought and over time I ended up selling my Logikit CMOS4 keyer that I built. I sold it not because it's a poor keyer but  being a stand alone keyer made it for me a hassle to program.  I missed just starting up the PC opening a program typing in what I wanted the keyer do and simply saving that sequence.  I do a lot of CW contests and have to keep changing the exchanges. With the CMOS4 keyer I was always taking out the manual and refreshing my poor memory with the proper sequence of buttons to push on the keyer to enter and save morse code in the CMOS 4 memory.
So I sold the Logikit keyer CMOS4 and Julie had purchased me the K1EL WKUSB keyer kit. I am familiar with the WKUSB keyer as some years ago I did purchase a built unit and it worked great. At the time it did seem to have some issues with my contest program N1MM. I ended up selling the unit and as they say hind sight is 20/20 and if I knew then what I do now I would still have it. This keyer has been around for some time now and improvements have been made. To hook it up to the PC is a simple USB cable along with some software and you are off to the races. To change the CW messages you open a program on your PC enter your new message then save to the key and that's it. You are able to enter four separate messages (just great for contests or DXepedtion contacts) The keyer can be connected to two rigs, my K3 and K2 can use the same unit without cable swapping. So back to the software for just one more moment.....not only can you program messages BUT there is a slew of custom settings you can enter such as spacing, weight and tone just to mention a very few extras. I hope this weekend to heat up the soldering iron and point it in the direction of this kit!!

Saturday, February 23, 2013

Announcing a new blog

Back in December when my second Elecraft K2 kit arrived I tossed around the idea of starting an additional blog about my K2 build. I planned to not only document my kit build but to keep the site updated with links and sites that will help out fellow builders. I have up to this point produced 3 pages and some updating posts on the blog itself. Check out the blog and give me  your feedback as well as any info you would like to see on the site as well.

Saturday, February 9, 2013

Snow day = radio time!!

Working the KX3
OQ5A setup
On Friday I was able to take the opportunity to get some well deserved radio time in. Most weeknights when I get in from work and get the "house stuff" done I find I'm just to tired for the rig. On Friday I was able to fire up the KX3 and try my hand at some QRPp operationing. I was scanning up and down 20m's and found OQ5A from Belgium calling CQ. I adjusted the KX3 to 100mW's of power and gave OQ5A a go, he came back to me and with just a few repeats all the contact info was passed along and the QSO is in the books. This contact  at 100mW's netted me a distance of  37,603 miles per watt. 

Sunday, November 11, 2012

How do you sell an Elecraft K2

My first K2 serial 6613
This week I posted a question on the Elecraft reflector "I'm building a bare bones Elecraft K2 radio and later will be putting it up for sale what kind of options would a buyer be looking for?" I had received many replies and all were very good but also got me thinking. I had always thought of the K2 as a CW radio (selfish me as I am a CW op) but one of the first suggestions was to make the radio both CW and SSB friendly by adding the SSB option. To me that should had a been a no brainier as that opens the market much wider to more potential buyers. I was then also reminded of the invaluable add on that I put in my K2 radio (which is still in my shack and goes out on park and car expeditions) the rework eliminators by unpcbs. These folks have

Thursday, November 8, 2012

Winter project line ups

Now that fall is in full swing and most.....typo alert remove  "and most" (thanks to Gary at rework eliminator for Elecraft K2)and soon all the leaves will have dropped from the trees. The temps  already are starting to drop not yet to freezing but soon. So outdoor activities will be more limited as winter gets her firm grip on this QTH. 
Serial 7372 soon in the works
I find that radio conditions do improve in the winter months and there are some major CW contest to keep me busy on some of the weekends....but.....I don't know about my readers but I also like to have a few winter radio projects on the go. This winter's project is an ambitious one that satisfies my kit building hunger. I purchased another Eelecraft K2 kit, my first K2 kit was a blast to build. With this kit I want to take my time and very much enjoy the build. Another decision I made was to sell the rig once built and run through it's paces. I then can use those funds to put toward my next winters project. I try to keep what I call my well rounded approach to ham radio. This includes on air operating time for sure, reading my monthly ham radio
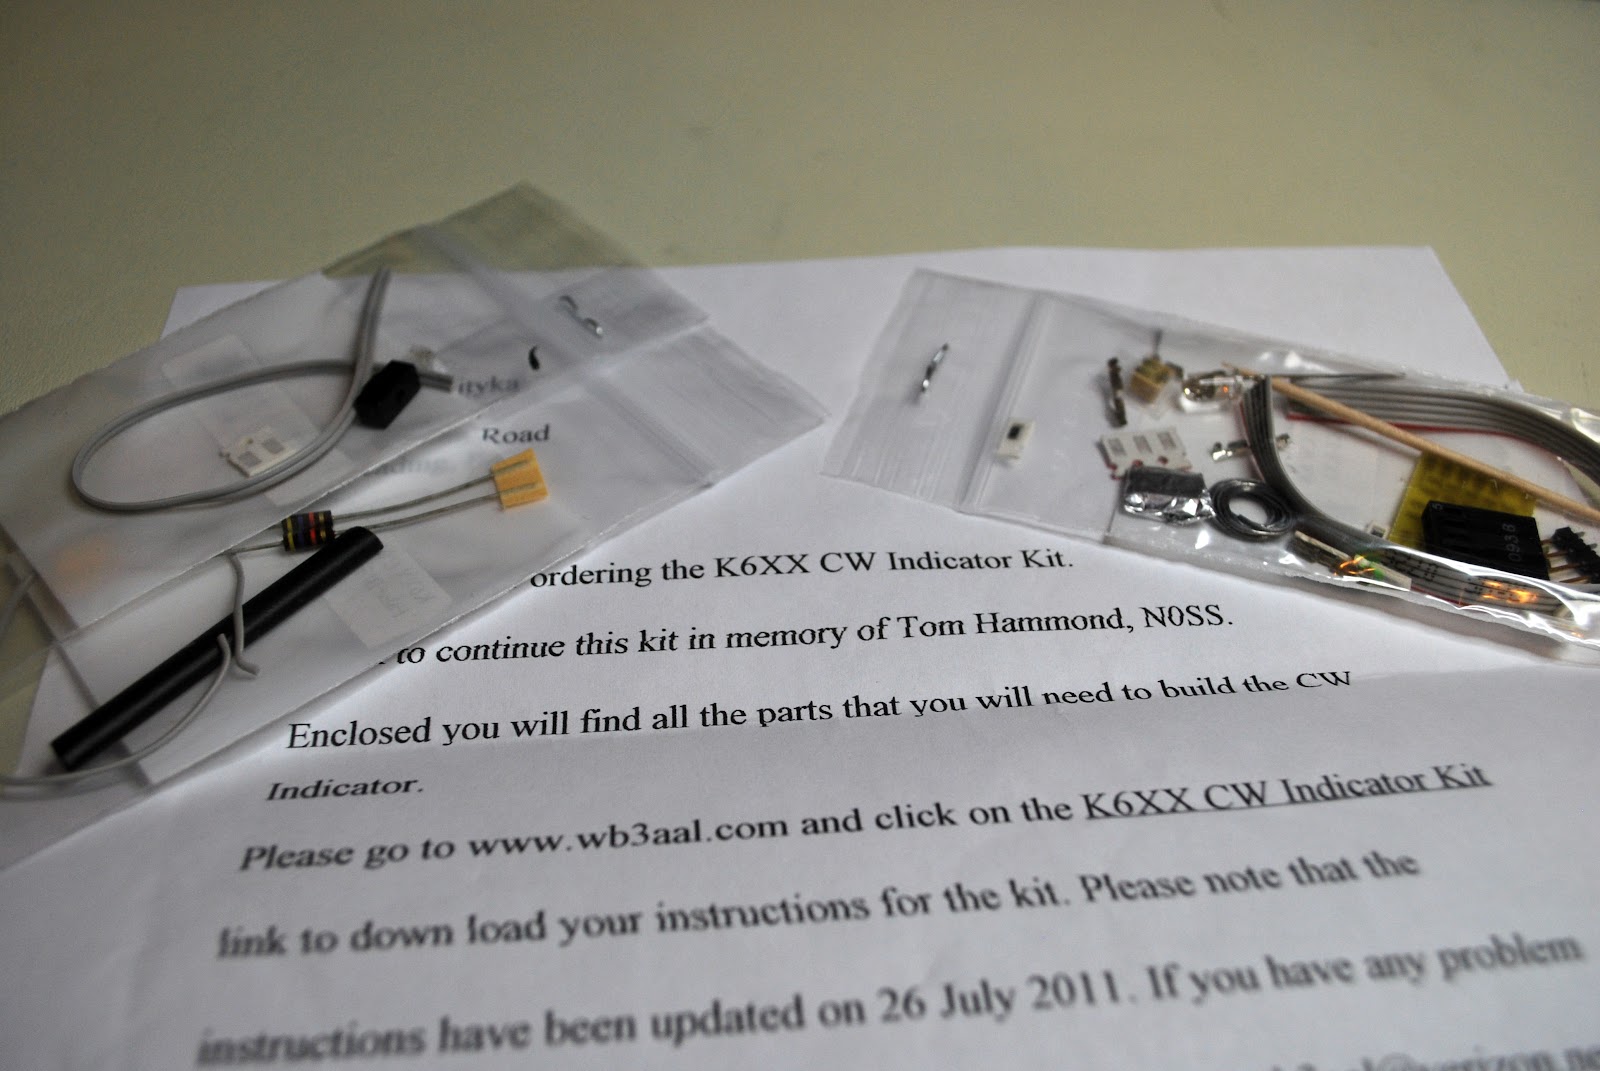
K6XX's kit for the K2
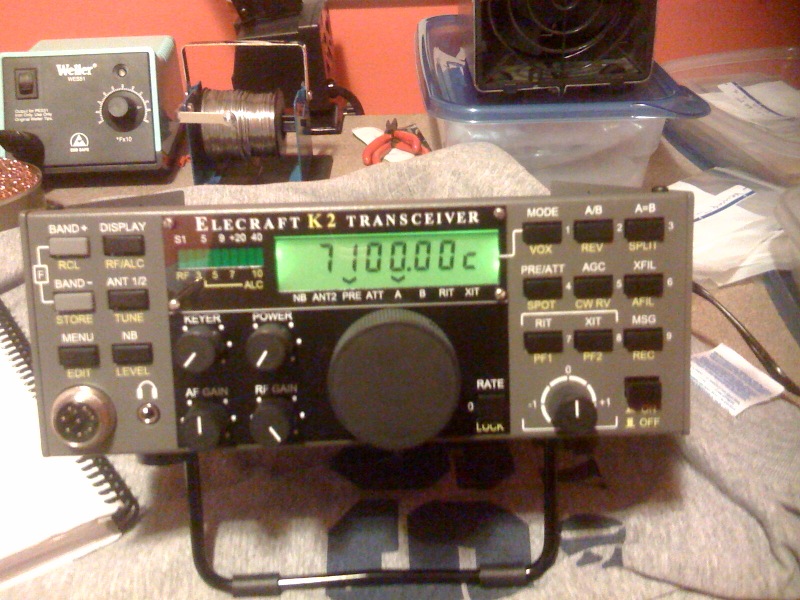
magazines, blogging and blog reading, interfacing computers with the hobby and of coarse kit building. I also wanted to add a CW tuning aid to my original Elecraft K2 and it just so happens that K6XX has a kit to add a CW tuning  indicator to the rig.  This kit has the dreaded SMD parts!!!! Now having said that I used to say that about kits that came with winding toroid's and that is not a big deal anymore. Below is a video of how the tuning light works.


Saturday, November 3, 2012

Elecraft KX3 part 3 youtube assembly video

Well the KX3 is almost completed and this is the 3rd of a 4 part assembly video of the radio. In this YouTube video I go over the problems I had with the ATU installation, the roofing filter board issue and the battery holder oops I had and needed to correct before there was damage. The build is almost complete but have a look and either get excited about purchasing one or pick up some pointers before you do  your build.


Sunday, September 2, 2012

A VERY SMART charger

Charger ready for testing
I have built  A&A Engineering's 1 amp Smart Battery QRP charger mainly for my Elecraft K2's internal battery. This very much is a smart charger and here are a FEW reasons why.....

1. The charger can be connected to the battery indefinitely and no harm will come to the battery. Once the battery is fully charged the Smart charger will remain in maintenance mode delivering a float charge. Therefore the battery cannot be over charged.

2. The charger can stay hooked up to the battery while operating the radio if you so choose to do so. The charger will enter the bulk mode to help with the load of the radio operating.

3. When the charger is connected it automatically determines the type of charge the battery needs.

Monday, August 6, 2012

Weekend happenings........

During the NAQP CW contest
In Canada Monday is a civic holiday.....translation...LONG WEEKEND!!! The weather has been a mixed bag of sun, heat and thunderstorms with heavy rain storms. On Friday a package arrived for me from A&A Engineering. My Elecraft K2 is outfitted with the the internal rechargeable battery. A&A Engineering offers a great charger called a smart charger it's combo 1amp swithchable to .05amp charger. Of coarse I ordered it as a kit and I am looking forward to building it in the near future. So there will be more on the charger when the build happens this thing is great and can really extend the life of your rechargeable batteries.

Friday, July 13, 2012

Hendricks 41dB attenuator built and added to the mix

Hendricks attenuator in service
It's Friday and the IARU contest is tomorrow, I had been checking out the propagation throughout the week and things seem to be calming down. Well until yesterday afternoon and the sun released an X1.4 solar flare and if that was not enough a CME as well..... Oh did I mention the CME is headed in our direction as well. So far the solar-terrestrial data seems to be ok. What's not to bad about a proportional hiccup is that it affects all of us, not saying that is a good thing but in the contest  the playing field stays level. This past week my Hendricks 41dB attenuator came in. The assembly was straight forward and was done in no time it
Final testing
tested out ok and I was ready to start using it. The attenuator has to go in series with my antenna  I placed it in series with my antenna B port on the K3. Both feeds from the K3 (antenna A port and B port) go to a LDG DTS-4 switch. Here I am able to place the dipole antenna in series with either antenna Port A or B. I did this as I can set up the K3 to have different settings (power output, filter selections, ATU on or off... etc) for each antenna port. So I select either antenna A or B on the K3 and then on the DTS-4 I select either attenuator in or out.

Monday, July 2, 2012

It's time for surgery...........

Ready for action
The time has come for me to open up my Elecraft K3 and preform some surgery. When I purchased the Elecraft P3 to enhance my K3 all was fine until the P3SVGA board was added to the P3. Since the power source for the P3 comes from the K3 with the addition of the P3SVGA board to much power was being  drawn. A
Diode to be removed
resettable fuse in the K3 now and then would trip out. So Elecraft (as they always do) came up with a mod for this problem.  The mod was sent out free BUT it meant opening up my 4k plus radio and removing one SMT diode, inductor and resettable fuse and replacing them with beefed up components. I didn't mind opening up the K3 and adding plug-in components....whole different story when it comes to De-soldering and soldering on the boards!!! For that reason the mod kit sat on my self for about 2 months, after all the P3 was now plugged into it's own power source so the problem was more or less solved.  This weekend in Canada is a long weekend (Canada day) and as always I get bored when I have to much time on my hands.......a little bird whispered in my ear that the board-um can be solved by doing the long over due K3 mod!!!  The board-um got the best of me along with that dam bird!!  I removed the K3 from service and I will say there sure is lots
Fans removed
KPA3 removed
of cables that go into the rig!! With the rig on the bench and beads of sweat starting to form I was off to the races and I hope with a celebration when I hit the finish line!!  As many times in the past I took the covers off and dove in. The first step was to remove the SMT diode easer said then done. This thing is very small it came out with

Tuesday, April 10, 2012

QRPometer ready for action

QRPometer complete
Well the QRPometer has made it from a pile of parts to a very useful tool for the shack and portable op's. It's no wonder this kit sold out in record time and now the 4 state QRP group will have to round up more parts and move out some more kits as the demand is out there. I began this project the same way I have with all my projects.... by doing a parts inventory. That went by without a hitch all the parts and pieces were present and accounted for. It was then off to the "puttin" the parts where they belong. The instructions are very easy to

Friday, April 6, 2012

The QRPometer arrived

The 4 state QRP QRPometer
Back in late March I read on W2LJ's blog a post about the new QRPometer available from the 4 state QRP group. At the time I was also building my Elecraft KAT2 antenna tuner. I was getting to the stage of testing and setting up the tuner. I needed a watt meter for one of the tests. I do have the LP-100A meter and it is a super meter! BUT for me to use this meter it involves removing it from my Elecraft K3 setup and that is a REAL pain to do. So reading Larry's post about this new meter had me come to the understanding that this unit would be a nice fit for my shack......and also it's a kit! This little unit is a great SWR and watt meter. It's reads from 10 watts and goes down to 100mW's it has a large easy to read LED read out. The kit arrived at the shack on Wednesday of this week and it's still waiting assembly. I was fortunate to get the kit as it sold out very fast. I hope to get the unit built over the Easter weekend.

Saturday, March 24, 2012

A kit builders "magic" tool


I really enjoy kit building I find it to be a nice pass time when the propagation is not co-operative and the bands are slow. With kit building it's a learning curve starting out with basic kits and moving up to kits that